Picture this: You are a product manager who has been brewing a wonderful feature for a while now. After weeks of getting engineers and different teams together on what needs to be done, several scope changes, and compromises later, you are all set to roll out. Fingers crossed.
Come Wednesday evening, you roll that feature out, and it goes smoothly. Over the next couple of days, you roll it out to everyone. You sit on your analytics dashboard to see the user events streaming in, and you get a shocker. People are visiting the tab, but somewhere in the journey, they are dropping off. The funnel looks large at the mouth, but there are next to no conversions (hence the name: Funnel).
The first step: Check the flow once again to ensure no bugs got pushed. You frantically check the flow with all possible edge cases, and guess what? The engineering team has done an impressive job.
The next step is despair. "Oh, if only I knew what my customers were doing when they came to this screen!"
If you don't want to be that guy, then half of this post is for you. If you want to be that engineer who did a great job, this whole post is for you.
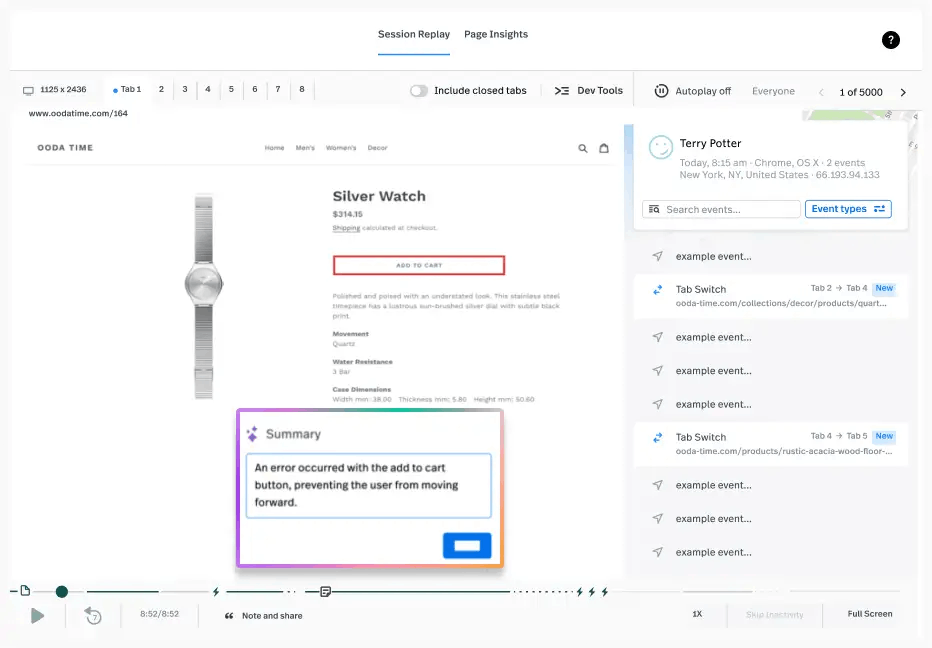
A potent tool in a product manager's arsenal as well as the arsenal of an engineer who is frustratingly debugging a user-reported issue is a feature called "Session replay".
It gives an in-depth overview of what the user did when they came onto an app or a website, which points they clicked on or what places they encountered crashes or the infamous "rage clicks".
I don't even have to start to tell you how useful it is day-to-day for debugging issues and figuring out optimisations to product flows (also, to humble us every now and then as product builders on our ignorance to other people's ways of doing and perceiving things).
FullStory is a company that has built a fortress around this very offering. There are other players, such as LogRocket and SessionRewind, to name a few.
Me being me, I thought, how do they do this? And this post is the result of some research and diving into that.
In this post, we'll explore:
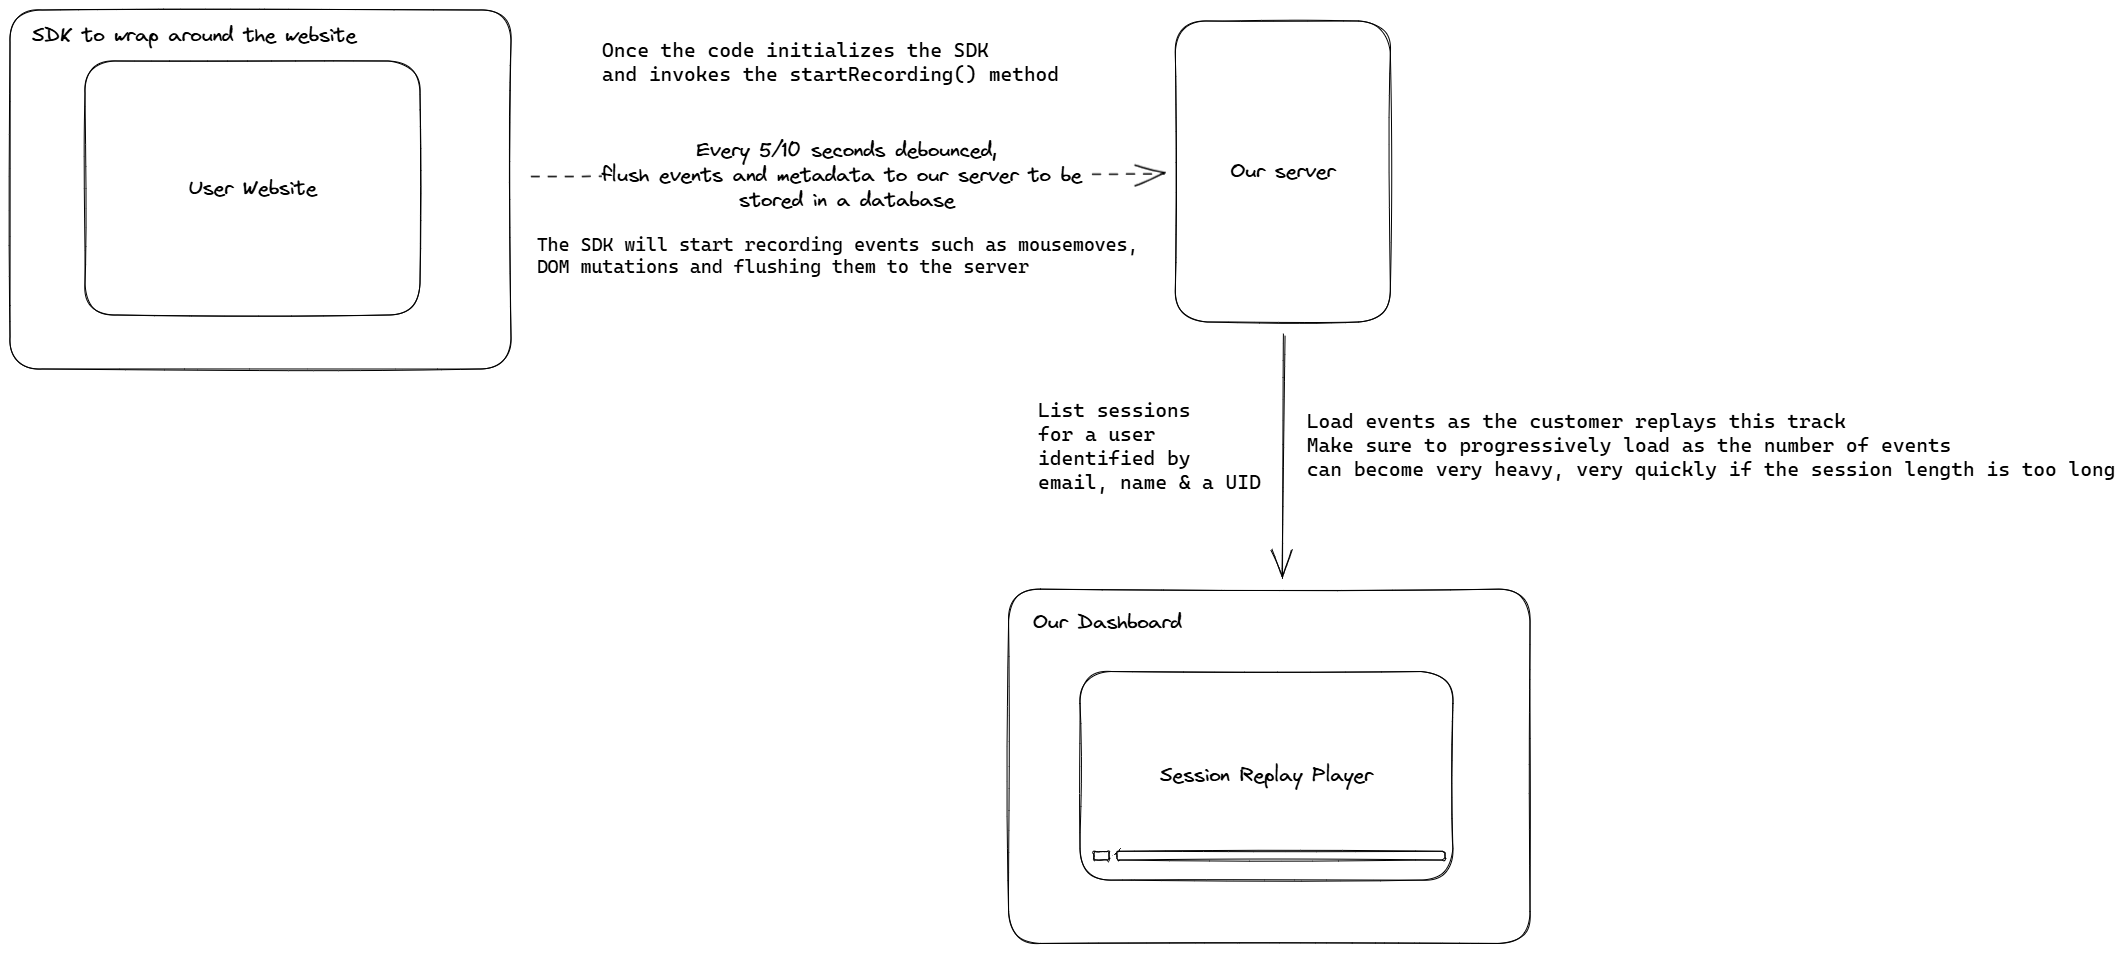
- The architecture via which we can record and store a user's session replay
- Creating an SDK to embed onto a website to record user sessions.
- The events we'll need to track and send to the server to build a session history
- Replaying a user session
- Extras: Stitching Sessions Together
- Extras: Tracking canvases
How do services do session recording and replay?
Core Concept: Services like LogRocket and others simply use the principle of tracking a page's HTML with the stylesheets applying on it as that is all you need to recreate what the user was seeing (Even if JavaScript is involved, it's execution simply means there would be some change in the HTML or CSS), changes can then be tracked as mutation events and then applied to the initial HTML at the time of replay. The user's mouse movements can also be tracked to let customers know where the user intended to click.
Let's take the example of LogRocket and how it does session recordings and replays.
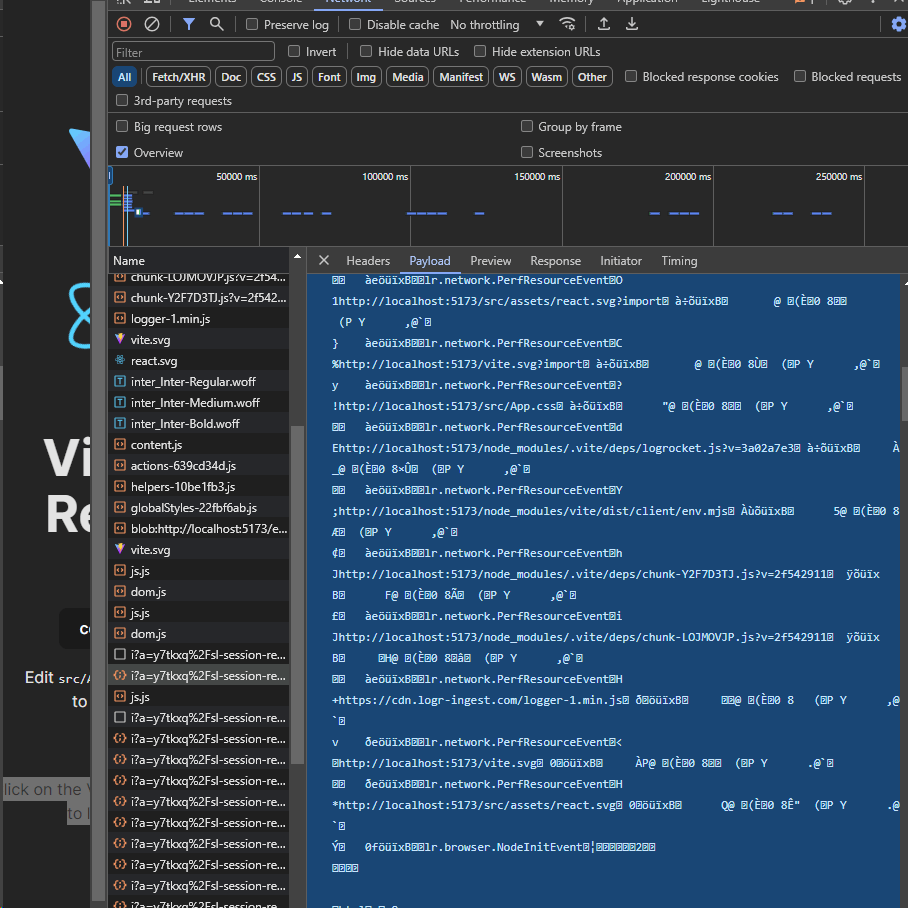
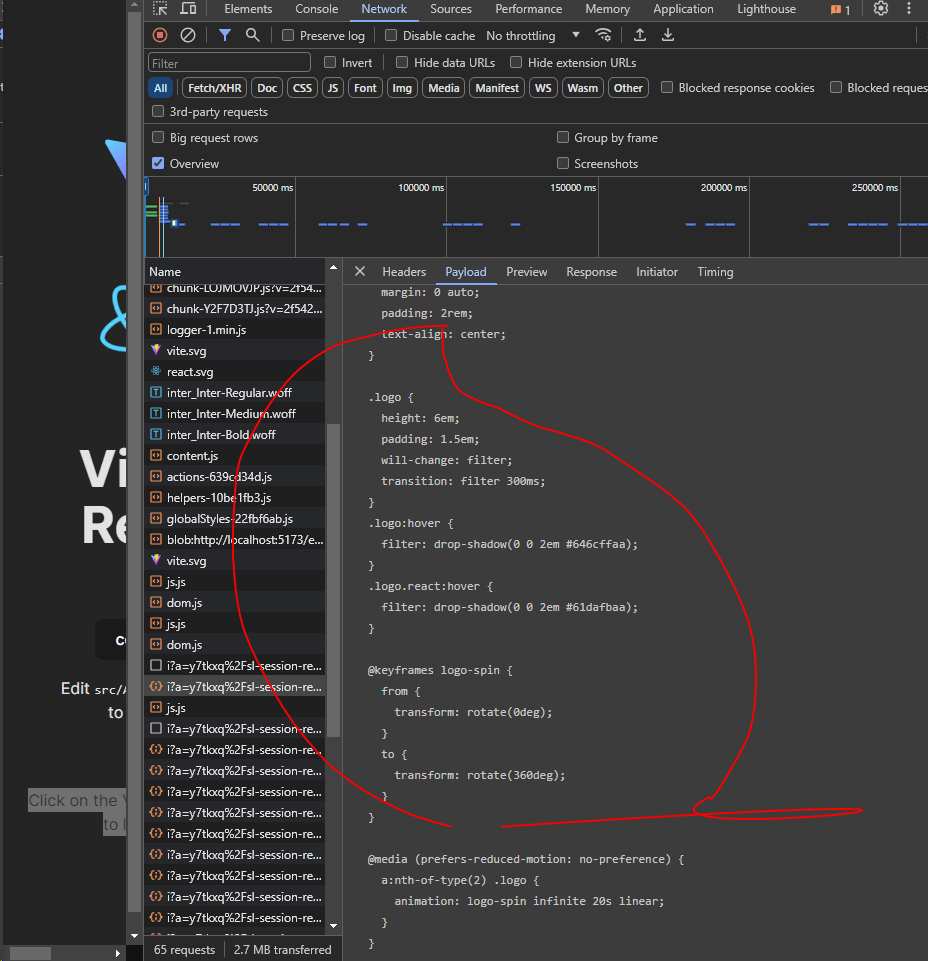
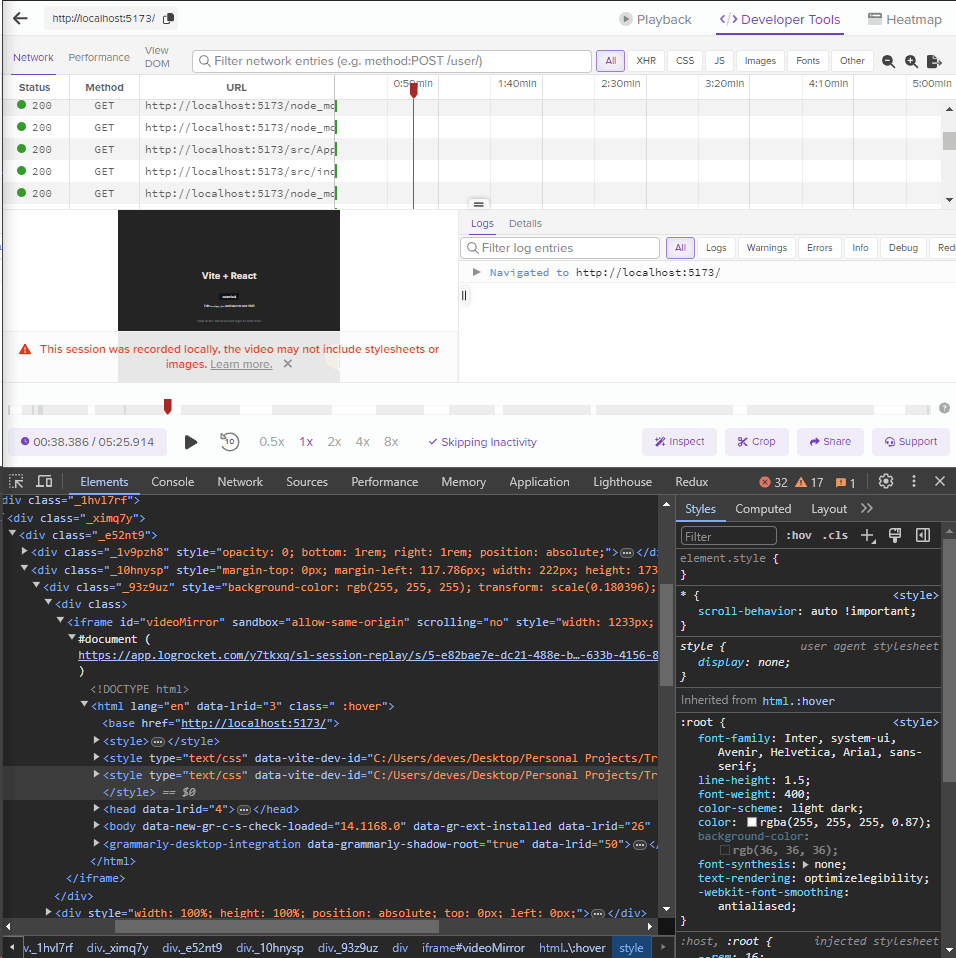
- LogRocket scaffolds/initialises the session via an initial network call; this includes all performance logs as well as the HTML for the page.
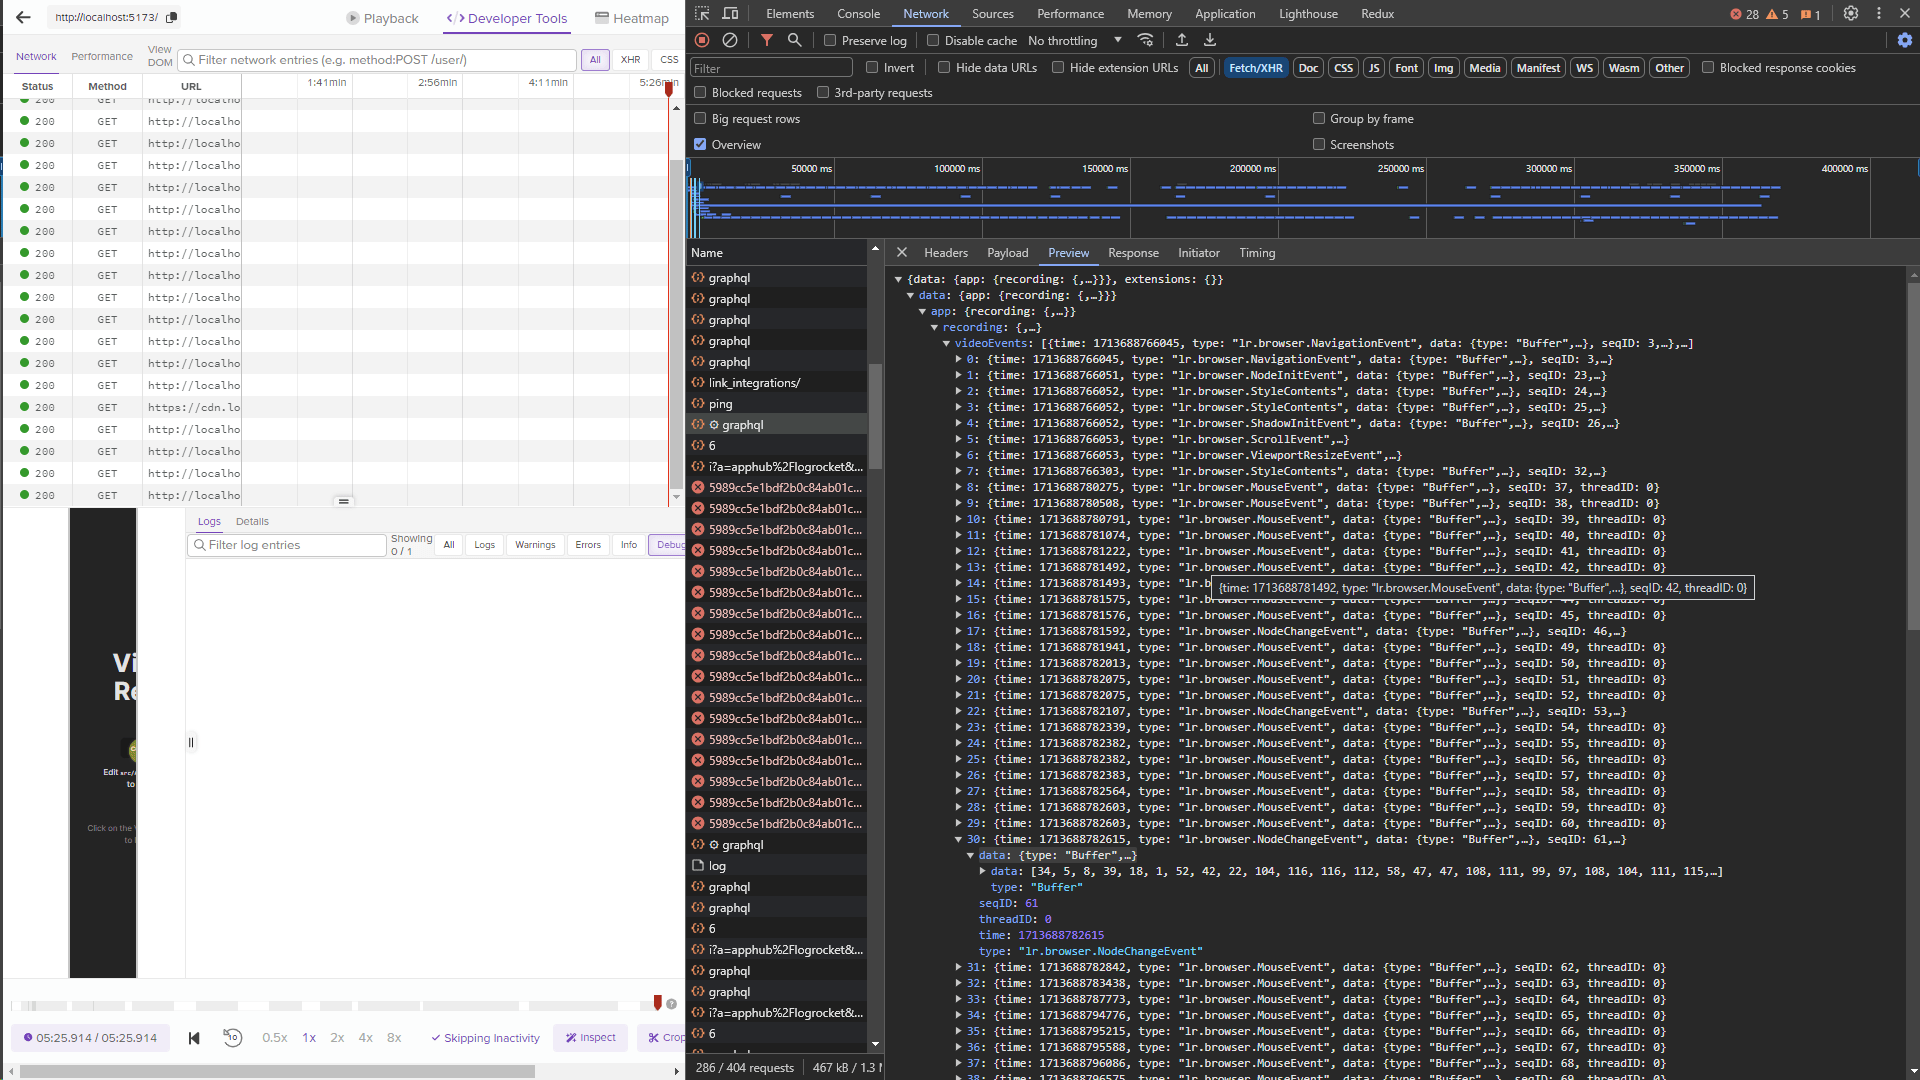
- All the data is encoded, but it’s still fairly simple to decipher.
- On every event, such as a MouseEvent, the data is throttled, denounced and sent over API calls.
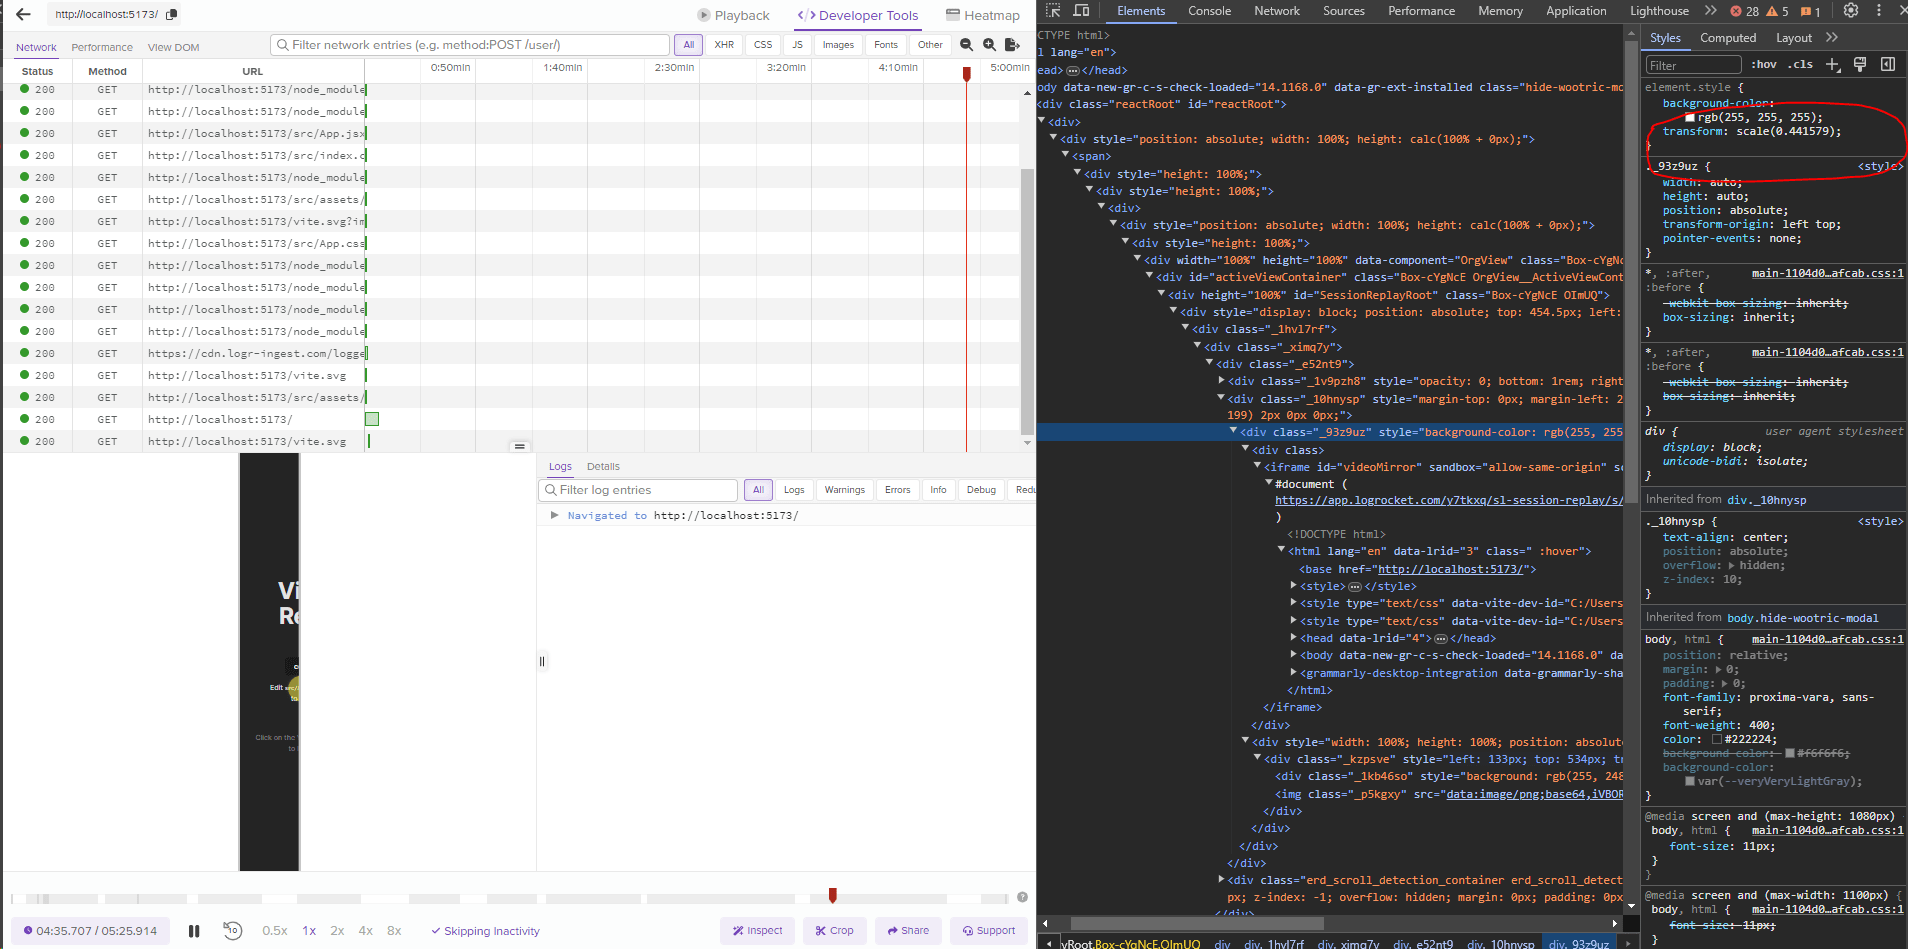
- The session replay then happens on the LogRocket dashboard via a sandbox iframe that contains the HTML of the page (minus scripts) – including all the stylesheets and assets that are linked to the same URL as they were on the user’s device page.
- Via
MouseEvents,StyleContents etc andNodeChangeEvents, LogRocket can make changes to the HTML inside the iframe to reflect actions done by the user and styling applied by the system.
- LogRocket’s dashboard takes care of the cursor outside the iframe via an event log and similarly takes care of relative body sizing and window size changes that happened during the session.
This covers the basics we need to know on how session recording works.
Let's get started.
The architecture via which we can record and store a user's session replay
Things to keep in mind:
- We need the database to be write-heavy, as the ratio of writes to reads will be very high. How we choose to store this data is up to us; it can be batched or one row/document per event linked to a user session.
- To factor in both the above, we need the data schema to allow for unstructured data, as we might want to club events into a single entity rather than having to create and query individual bits of events/metadata from a single row.
Creating an SDK to embed onto a website to record user sessions.
Let's create a basic SDK that our users will be able to npm install and include in their codebase.
The SDK will do the following:
- An API call to our central backend server to validate if the API key provided is valid. And prevent any further calls if the key is invalid.
- Creating a non-sticky session ID for use in a single browser tab on the same site for the user.
- Expose functions to mark a session associated with some user identifiers, such as
email,uidorname. - Sending the HTML and stylesheets + cursor movement events to our server to be stored for replaying later.
The Interface for the SDK:
class RewindSDK {
	private isRecording = false;
	private canSendMoreAPICalls = true;	// This is to enforce no more calls in case the API key is not valid or an API call fails due to server downtimes

	private apiKey: string = "";
	private baseURL: string = process.env.SERVER_BASE_URL || "";	// If the user wants to use their servers from our implementation

	private sessionId: string;

	private eventsQueue: UserEvent[] = [];

	constructor(initOptions: { baseURL?: string; apiKey: string }) {
		this.sessionId = generateAndGetUniqueSessionIdForTab();

		if (!initOptions)
			throw new Error("[Rewind.js] API Key is required for initialization.");

		if (initOptions.baseURL) this.baseURL = initOptions.baseURL;
		if (initOptions.apiKey) this.apiKey = initOptions.apiKey;
	}

	public setUserProperties(properties: {
		email?: string;
		uid: string;
		name: string;
		metadata?: Record<string, any>;
	}) {}

	public startRecording() {
	}

	public pauseRecording() {
	}

	private initialize() {
		// To be internally called from startRecording
	}

	private async flushEventsToServer() {
		if (!this.canSendMoreAPICalls) return;

		if (!this.eventsQueue.length) return;

		...
	}
}
Bundling it will be fairly straightforward; just bundle the code with Webpack or TSUP in UMD mode to be used in the browser.
The events we'll need to track and send to the server to build a session history
To build a user experience timeline, you have to track the following main events:
- The state of the HTML at the beginning of the session.
- Any changes to the HTML
- The user's mouse movements and clicks
The first one is pretty straightforward: You get the initial HTML and remove all script tags.
Since we're only concerned with the styling of elements and what content they have. We can ignore a big chunk of the page.
private setupInitialHTML() {
    const docClone = document.cloneNode(true) as Node & Document;

    // Remove all <script> tags from the cloned document
    docClone.querySelectorAll("script").forEach((el) => el.remove());

    // Remove all elements from <head> except <link> and <style>
    docClone
        .querySelectorAll("head > *:not(link):not(style)")
        .forEach((el) => el.remove());

    const initialScaffoldedHtml = `<!DOCTYPE html><html>${docClone.documentElement.innerHTML}</html>`;

    pushToQueue({
        type: "scaffolding",
        time: Date.now(),
        html: initialScaffoldedHtml,
    });
}
The second one is slightly tricky, but thankfully, we have MutationObserver with our browsers now which can notify us when the contents, attributes of a tag or entire tags on the webpage change.
To store mutation events in our database, we'll also have to serialise the events as objects and add identifier tags to each target that gets modified.
function serializeMutation(mutation: MutationRecord) {
    return {
        type: "mutation" as DOMMutationEvent["type"],
        subType: mutation.type as DOMMutationEvent["subType"],
        time: Date.now(),
        target: getElementPath(mutation.target as Node & Element),
        attributeName: mutation.attributeName || null,
        oldValue: mutation.oldValue || null,
        newValue:
            mutation.target.nodeValue || mutation.target.textContent || null,
        addedNodes: [...mutation.addedNodes].map(
            (node) => (node as Element).outerHTML || node.nodeValue
        ),
        removedNodes: [...mutation.removedNodes].map(
            (node) => (node as Element).outerHTML || node.nodeValue
        ),
    };
}

const headObserver = new MutationObserver((mutations) => {
    mutations.forEach((mutation) => {
        // Filter mutations to only include <link> and <style> tag changes
        if (
            mutation.target instanceof HTMLLinkElement ||
            mutation.target instanceof HTMLStyleElement ||
            [...mutation.addedNodes].some(
                (node) =>
                    node instanceof HTMLLinkElement ||
                    node instanceof HTMLStyleElement
            ) ||
            [...mutation.removedNodes].some(
                (node) =>
                    node instanceof HTMLLinkElement ||
                    node instanceof HTMLStyleElement
            )
        ) {
            pushToQueue(serializeMutation(mutation));
        }
    });
});

headObserver.observe(headTarget, {
    subtree: false,
    childList: true,
    attributes: true,
    characterData: true,
});

const bodyObserver = new MutationObserver((mutations) => {
    mutations.forEach((mutation) => {
        // Ignore mutations related to <script> tags
        if (
            mutation.target instanceof HTMLScriptElement ||
            [...mutation.addedNodes].some(
                (node) => node instanceof HTMLScriptElement
            ) ||
            [...mutation.removedNodes].some(
                (node) => node instanceof HTMLScriptElement
            )
        )
            return;

        pushToQueue(serializeMutation(mutation));
    });
});

bodyObserver.observe(bodyTarget, {
    childList: true,
    subtree: true,
    attributes: true,
    characterData: true,
});
Now, on to the last bit, listening for mouse movements and clicks. This should be the most straightforward.
let lastMouseMoveEvent: UserEvent | null = null;
let throttlingMouseMoveEvents = false;

function onMouseMove(event: MouseEvent) {
	lastMouseMoveEvent = { type: "mousemove", time: Date.now(), x: event.clientX, y: event.clientY };

	if (!throttlingMouseMoveEvents) {
		throttlingMouseMoveEvents = true;

		setTimeout(() => {
			if (lastMouseMoveEvent) pushToQueue(lastMouseMoveEvent);
			throttlingMouseMoveEvents = false;
		}, 100);
	}
}

function onMouseClick(event: MouseEvent) {
	pushToQueue({ type: "mouseclick", time: Date.now(), x: event.clientX, y: event.clientY });
}

document.addEventListener("mousemove", onMouseMove);
document.addEventListener("click", onMouseClick);
Bonus: As input events are also a core part of the user experience, we can track them too. Be very mindful here, as this data can be super sensitive.
My advice is simply ignore input targets that have
typesset tophoneorpasswordand don't log them at all.
function inputsEventListener(event: Event) {
    const target = event.target as EventTarget as Element;

    if (!target) return;

    if (target.tagName === "INPUT" || target.tagName === "TEXTAREA") {
        pushToQueue({
            type: "input",
            target: getElementPath(target),
            time: Date.now(),
            // @ts-ignore Can't get InputElement or TextAreaElement interfaces for some reason
            newValue: target.value,
        });
    }
}

document.addEventListener("input", inputsEventListener);
Once these events are tracked and added to a logging queue, we can periodically (every 3-6 seconds and on page unmount) flush these events to the server.
Additionally, we can also add a tab unmount listener that sends any queued events to the server if the user prematurely closes the tab (although the reliability of that event is always a question, especially with async actions).
To make sure our calls go through, add the keepalive flag to any connection that gets opened between the client and the server so your events don't drop if the tab/window is closed prematurely by the user.
Replaying a user session
Once we have stored enough data for a session in our database, replaying it is straightforward.
A video is nothing but a string of frames with differences between them, played at a speed the human eye perceives to be instantaneous. We'll use the same mechanism here.
We can build a replay iframe with the same aspect ratio as the user's device (important, as we have mouseover and click events that need to be calibrated on the frame), and with some math, we'll work with those event positions on the screen.
We'll use the scaffolding event to set the initial HTML of the frame, and then all subsequent events will be played on top of the initial HTML as DOM mutations.
Our server will help us here with two things:
- Give us a list of sessions and allow us to filter by other metrics.
- Once the customer starts replaying a session, our server is then responsible for:
- Sending basic metadata of the session, like the amount of time the session was active.
- Streaming back chunks of events, including
scaffoldingandmousemoveevents based on where the customer is in the replay timeline (effectively buffering similar to a video).
Some nuances we'll have to work with:
- We'll have to figure out how to play something in a sandbox so that the stylesheets do not interfere with the container page.
- What do we do when the user seeks a specific position in the replay? How do we bring the session replay suddenly to that point?
The answer to Question 1 is pretty straightforward; we'll build an isolated page that can then be embedded as an iframe onto the session replay page. IFrames load resources internally without interfering with the stylesheets or execution contexts of the parent element + Support message passing for interactivity.
We would, however, include the seeker and tracks in the separate iframe page itself. I.e., handing over complete replay control to the embedded iframe.
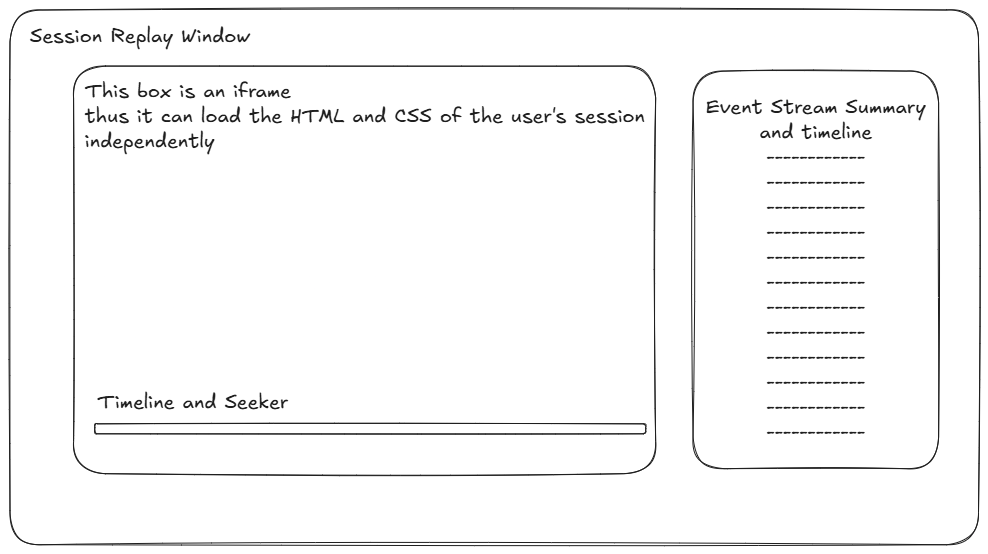
The answer to Question 2 is slightly tricky. We'll get back to that as we go forward.
Let's see an overview of how the session replay will work.
- When the user starts the replay, send the scaffolding HTML and stylesheet links to the iframe to set up.
- The seeker length and periods are set up based on the first and last event times of events.
- The user sees the page load in front of them.
- We keep buffering events by time in the background till we have loaded all events. Since this is text, it should not be as heavy as a video file.
Interestingly, I worked with a similar concept for my product Hobnob back in 2020.
Coming back to Question 2: What do we do when the user seeks a specific position in the replay? The quickest and simplest solution is:
- If the user seeks forward, HTML transitions and updates are pretty fast, taking milliseconds at best. Thus, we'll just take all the events from the point the user is at and apply them quickly on a virtual DOM and just set the HTML in the iframe to the final state of the computation.
- If the user seeks backwards? While slightly trickier. This can be achieved by following a simple pattern: Take the initial HTML of the session itself and keep applying the events till the point the user has sought, disregarding the point the user is at currently. Set the HTML of the iframe to the final state of the computation.
If the recording is slightly longer, these operations could take up to a second or more. But that is fine to begin with.
Extras: Stitching Sessions Together
A neat feature with replay tools is the ability to see multiple instances of users visiting the site and "continuing" left-off sessions.
What we will not do: Stitching of parallel sessions in multiple tabs. What we will do: Stitching of sequential sessions in different tabs.
How do we do this? Simple: Each time a new tab is opened, it sends a request for scaffolding. While we track this, we will also check if this is a new tab in parallel or a restart of the user's journey.
If there are no other tabs/session IDs currently active for the user, we'll treat it as a new journey and stitch it together with the last session the user finished. If there are other tabs/session IDs active for the user, we'll treat it as a parallel session and show it as a new entry in the user sessions list.
This also allows us to show periods of inactivity on our replay timeline.
Extras: Tracking Canvases
One feature all session replay tools have missing is the ability to track canvases; this eliminates their use case for a big chunk of applications (think of someone like Miro, Whimsical and 3D design tools, which have a big part of their user experience on canvases).
There are a few ideas I am thinking of:
- Since a canvas is effectively an element that is painted, we can list the canvas elements on the page and extract its Base 64 data periodically, compare if anything has changed from the previous frame and send a diff of the same to our server.
- The providers of canvas-based reactivity understand that tracking the canvas is a heavy operation. And would be more than okay with getting a recorded canvas with a 2-3 second interval (it might look laggy, but the point is to track user interactions on a time-to-time basis).
Outcome
This project is being developed by me as a self-hostable open-source tool, and I'm naming it Rewind.js. You can find the source code for it in development here: https://github.com/deve-sh/Rewind.js.
Hope you guys had fun reading this.
